
Kitchen renovations. Just the words can send shivers down a homeowner’s spine. While the promise of a beautiful, new space is exciting, the reality of living without a functional kitchen for weeks (or even months!) can feel daunting. But fear not! With a little planning, you can set up a temporary kitchen. It keeps your family fed and (relatively) sane during the chaos. And guess what? This can even be a fun family project!
Step 1: Designate Your Zone
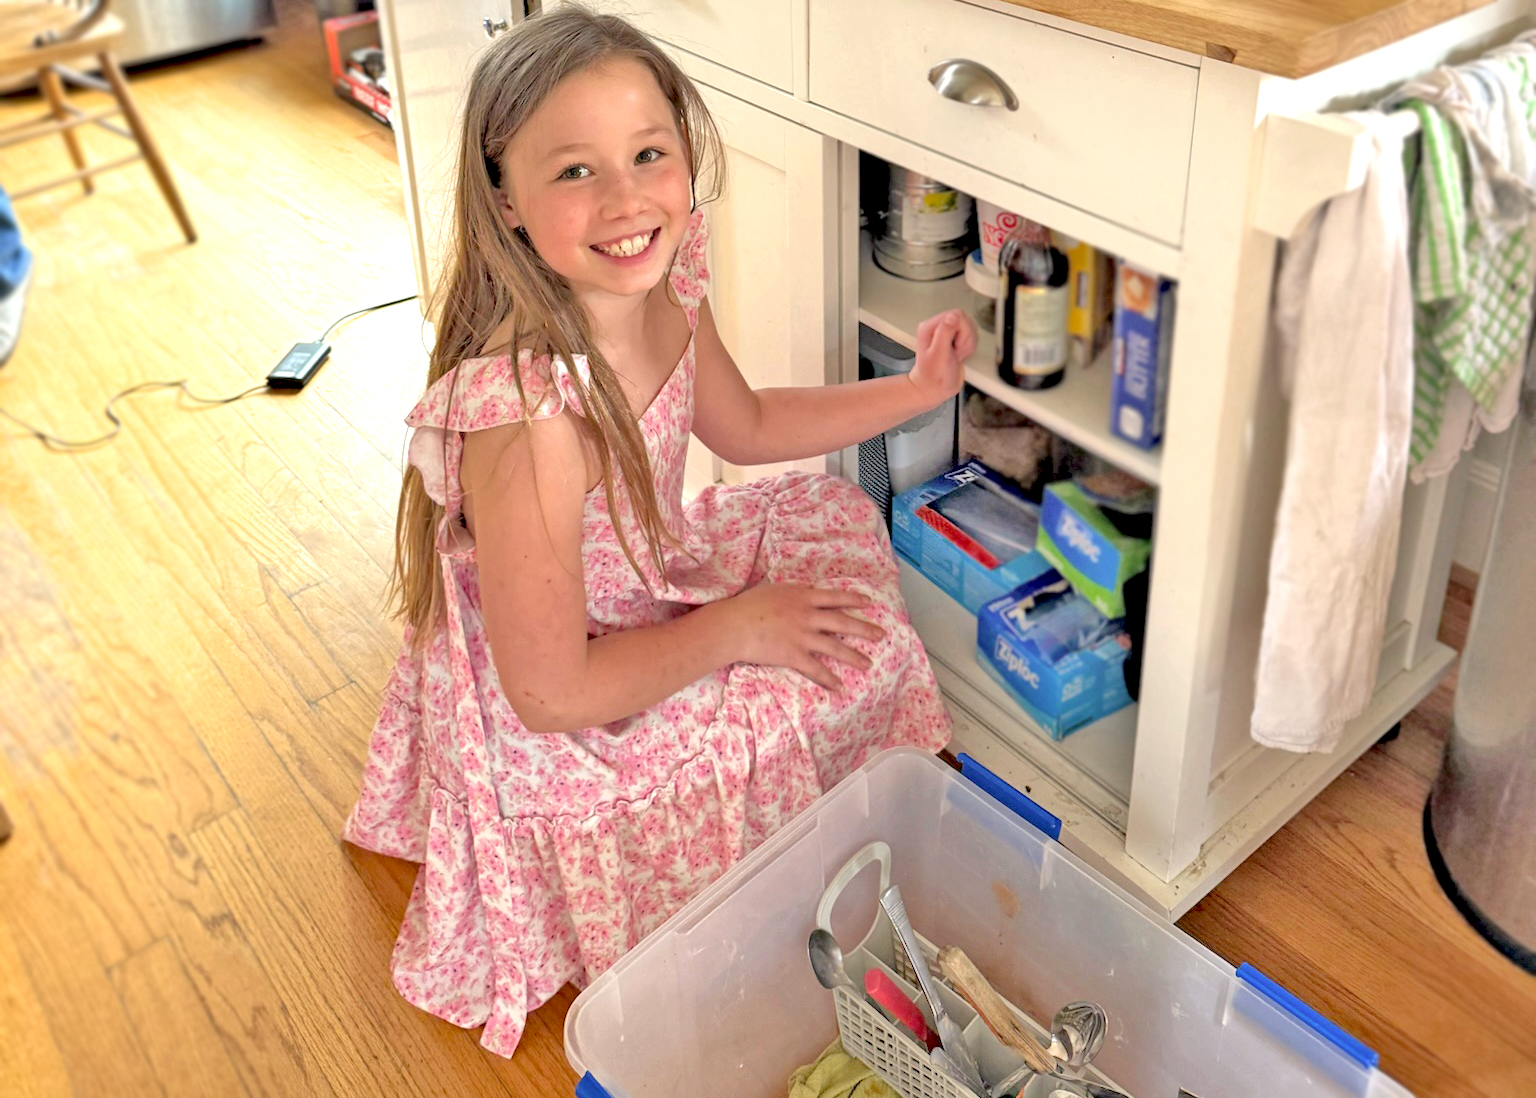
First things first, decide where your temporary kitchen will live. A spare bedroom, the dining room, or even a covered patio can work. Consider factors like access to electricity and natural light. Once you’ve chosen your spot, clear the area. Get the kids involved in the “deconstruction” phase. They can safely move out any unnecessary furniture or items. This gives them a sense of ownership in the process.

Step 2: Setting Up Your Stations
Think about the essential functions of a kitchen and create dedicated stations:
- The Water Station: Let’s face it, washing dishes and hands is non-negotiable. If you have a utility sink nearby, fantastic! If not, get creative. A large plastic tub or bin placed on a sturdy surface can act as your temporary sink. Involve the kids in filling jugs of water for washing and rinsing. Consider a collapsible dish drying rack to save space. For drinking water, a water dispenser or even a large pitcher kept in a cooler can work wonders.
- The Cook Station: This is where the magic (or at least dinner) happens. Depending on your needs and available space, this could be a portable induction cook-top or an electric skillet. It could also be a microwave. You might even use an outdoor grill if the weather permits. Safety is paramount here, so ensure any cooking appliances are placed on a stable, heat-resistant surface away from flammable materials. Older kids can help gather necessary cooking utensils and non-perishable ingredients.
- The Prep Station: You’ll need a surface for chopping, mixing, and assembling meals. This is where re-purposing comes in handy! An old dining table can work perfectly. A folding card table is also effective. Even a sturdy storage ottoman with a flat top can serve the purpose. Get the kids involved in wiping down surfaces and organizing prep tools. Consider using cutting boards with non-slip mats for added stability.

Step 3: Embrace Re-purposing and Temporary Solutions
This is where your inner MacGyver comes out! Look around your house for items that can be temporarily repurposed:
- Shelving: That bookshelf in the guest room? It can become your temporary pantry! Clear out the books and use the shelves to store non-perishable food items, snacks, and even your temporary dishware.
- Buffets and Sideboards: These pieces of furniture can be fantastic for storing larger items. They can also act as a serving station. If you have them, consider using them to house your microwave.
- Storage Bins and Crates: These are your best friends for keeping things organized. Label everything clearly so everyone knows where to find what they need. Kids can be in charge of sorting and labeling items.

Step 4: Smart Product Picks for a Smoother Transition
Investing in a few key items can significantly improve the functionality of your temporary kitchen:
- Portable Induction Cook-top: Offers a safe and efficient way to cook without a traditional stove-top.
- Electric Skillet or Multi-Cooker: Versatile appliances for frying, sautéing, roasting, and even slow cooking.
- Microwave: A must-have for quick meals and reheating.
- Collapsible Dish Drying Rack: Saves precious counter space.
- Stackable Storage Containers: Keep food fresh and your temporary pantry organized.
- Water Dispenser: Provides easy access to clean drinking water.
- Heavy-Duty Extension Cords: Ensure safe power access for your appliances.
- Bright Task Lighting: Good lighting makes food prep and cleanup much easier.

Making it a Family Affair
Setting up a temporary kitchen doesn’t have to be a solo mission. Involving your children not only lightens your load but also teaches them valuable problem-solving and organizational skills. Assign them age-appropriate tasks, from carrying boxes to organizing utensils. Frame it as a team effort to “camp out” in a different part of the house.
The Light at the End of the Tunnel
Living without a proper kitchen is temporary. Plan ahead. Get creative with your space. Involve the whole family. This way, you can create a functional temporary kitchen that minimizes disruption. It will also keep everyone well-fed until your dream kitchen is finally complete. So, embrace the challenge, get organized, and remember – this too shall pass (and you’ll have a beautiful new kitchen to show for it!).

**Note: All photos are real photos of a family during a kitchen renovation by Menlo. Please respect this family. Menlo Construction LLC does not give permission to any person or entity to share these photos beyond this blog post.


Leave a Reply